Bombay Kaja is a traditional Indian dessert that hails from the bustling streets of Bombay. With its origins deeply rooted in Indian cuisine, this sweet treat captivates taste buds with its unique blend of flavours and textures.
To create this delectable dish, a mixture of sieved maida, Ghee, and rice flour is combined with a pinch of cooking soda and kesari powder. The dough is then kneaded to a poori-like consistency, resulting in a soft and pliable base for the pastries.
The preparation of Bombay Kaja involves rolling small balls of dough into puris and spreading a mixture of rice flour and Ghee on top. These puris are then shaped into triangles or rolls, dusted with rice flour, and fried to a beautiful golden brown in hot Ghee.
Once fried to perfection, the pastries are immersed in a sugar syrup that has been boiled to a one-string consistency. This syrup infuses the pies with sweet and syrupy goodness, making each bite a heavenly delight. Sprinkled with a touch of sugar, the Bombay Kaja is ready to be served and enjoyed.
This delightful dessert pairs well with hot chai or a refreshing glass of lassi. It is also an excellent addition to any festive occasion or as a sweet treat to end a meal on a high note. Indulge in the flavours of Bombay with this irresistible recipe for Bombay Kaja.
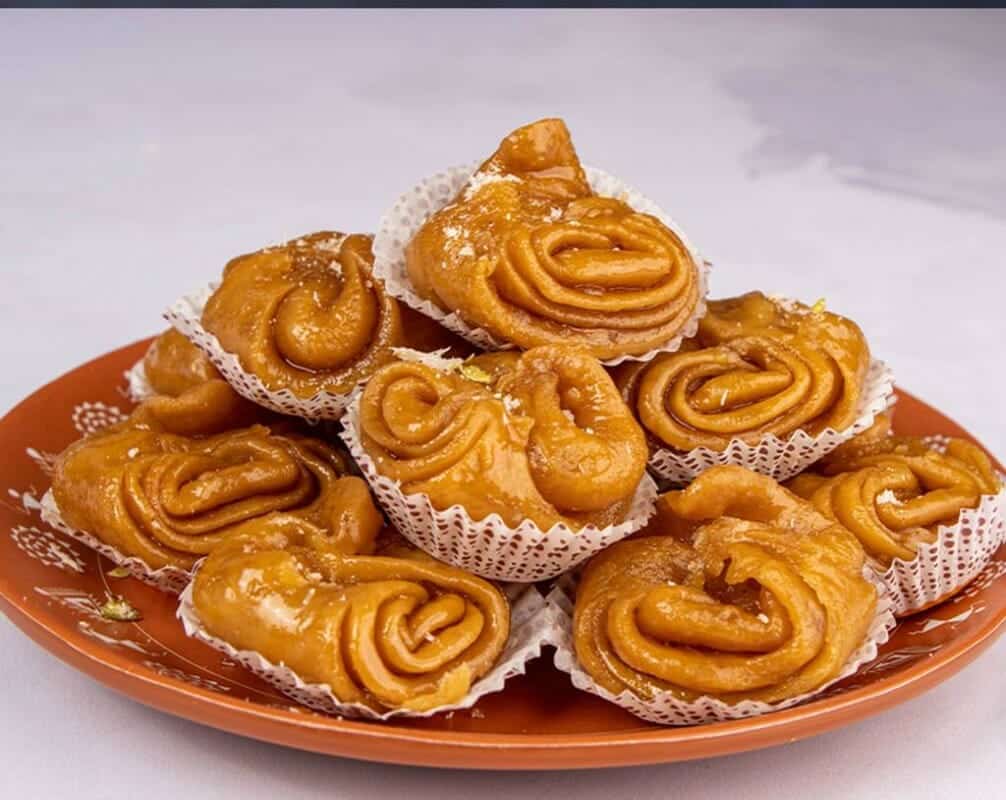
Bombay Kaja

Bombay Kaja
Ingredients
- 500 g Maida sieved
- 900 g Ghee
- 750 g Sugar
- 50 g Rice Flour some more for dusting
- A pinch of Cooking Soda
- Water as required
- 1/4 tsp Kesari Powder
Instructions
- mix cooking soda with 2 tbsp ghee in a bowl and add it to the sieved maida.
- Gradually add water to the mixture and mix well until a dough-like consistency is achieved.
- Add kesari powder to the dough and knead it well until it reaches a poori dough consistency.
- Mix 1 tbsp ghee with 50 gms rice flour in a separate bowl.
- In a pan, combine sugar and water, and boil until it reaches a one-string consistency. Set it aside.
- Roll small portions of the dough into small puris.
- Spread 1 tsp of the rice flour mixture on each puri and shape it into a triangle or roll.
- Dust the shaped pastries with rice flour.
- Heat ghee in a pan over medium flame.
- Fry the prepared triangles on both sides until they turn light golden brown.
- Remove the fried pastries from the pan and immerse them in the sugar syrup, ensuring they are thoroughly soaked.
- Transfer the soaked pastries to a plate and sprinkle them with sugar.
- Serve the delicious Bombay Kaja and savour the delightful flavours.
Are you craving a delightful Indian sweet treat? Look no further than the beloved Bombay Kaja, also known as Bombay Khaja! This scrumptious delicacy is a popular choice for those with a sweet tooth, and lucky for you, we have the perfect Bombay Kaja recipe to satisfy your craving.
To create these delectable snacks, you’ll need a few simple ingredients and some handy culinary skills. Let’s delve into the step-by-step instructions of how to make Kaja, a delightful sweet recipe that will surely impress your loved ones.
First, gather the necessary ingredients for this bombay kaja recipe. You’ll need all-purpose flour, ghee, water, sugar, cardamom powder, and oil for frying. These ingredients are the key to achieving the perfect balance of flavors and textures in this delightful sweet dish.
Now, onto the preparation process. Begin by preparing the dough for your kaja sweet. Mix the all-purpose flour with a generous amount of ghee, gradually adding water to form a smooth and pliable dough. Remember, the consistency of the dough plays a crucial role in creating the perfect texture for your kaja.
Once your dough is ready, divide it into small portions and roll them into thin, elongated shapes resembling small fingers. The trick here is to roll them thin enough to create a crispy and flaky texture when fried. Set these dough fingers aside for a moment.
Next, prepare the sugar syrup that will infuse your Bombay Kaja with a delightful sweetness. In a separate pot, combine sugar, water, and a dash of cardamom powder. Let it simmer until the sugar dissolves completely, and the mixture reaches a syrupy consistency. This aromatic syrup will elevate the flavors of your kaja and give it its signature sweetness.
Now it’s time to fry! Heat oil in a deep frying pan, ensuring it is hot enough for a quick and crispy fry. Gently drop the elongated dough fingers into the hot oil, frying them until they turn golden brown and achieve that irresistible crunchiness.
Once the dough fingers have achieved the perfect golden hue, remove them from the oil and dip them into the warm sugar syrup you prepared earlier. Allow them to soak for a few moments, ensuring they absorb just the right amount of sweetness.
And voila! Your homemade Bombay Kaja sweet snacks are ready to be savored. The combination of the crispy fried dough, infused with the aromatic sugar syrup, creates a delightful explosion of flavors in every bite.
Serve these mouth-watering kaja sweets as a delightful accompaniment to your evening tea or as a dessert after a delicious meal. They are sure to impress your guests and leave them craving for more.
Now that you know the secret to creating the perfect Bombay Kaja, don your apron, gather your ingredients, and embark on a culinary adventure. So, go ahead, indulge in the art of making traditional Indian sweets with this irresistible kaja sweet recipe. Enjoy!
FAQs:
How can I store Bombay Kaja?
To keep Bombay Kaja, place them in an airtight container at room temperature. They can be stored for up to a week. However, consuming them fresh for optimal taste and texture is best.
Can I make Bombay Kaja ahead of time?
Yes, you can make Bombay Kaja ahead of time. Prepare the pastries as instructed and store them in an airtight container. Just before serving, immerse them in the sugar syrup and sprinkle with sugar. This will ensure they remain fresh and delicious.
What are some suitable pairings for Bombay Kaja?
Bombay Kaja pairs well with a variety of Indian sweets and desserts. It can be served alongside Gulab Jamun, Jalebi, or Rabri for a delightful combination of flavours. These sweet treats complement each other perfectly, creating a memorable dessert experience.


1 comment
looks yummy!!